Wondering how loud your master should be? Maybe your tracks are being mixed too loudly and are being turned down on streaming services. Or, do they sound very quiet when compared to others?
In general, music loudness should be mastered for the primary platform it’s going to be played on. Many producers master their tracks for Spotify, which is -14 LUFS, and leave -1 dB of headroom for cleaner format conversions (.wav to .mp3).
In this article, I will go into depth about how loud you should master your tracks and also provide you with a list of different streaming services and the LUFS they expect. Along with some of my favorite resources for mastering.
What Is The Goal of Mastering?
The goal of mastering is to maximize the overall level of your recording while ensuring that it still sounds good. There are a few different ways to master music, but most people use a combination of compression and limiting for their final tricks.
Although there are several different ways to master music, mastering typically uses tools like equalization, compression, limiting, and stereo enhancement.
There are several different ways to master music but a lot of studios or mastering engineering incorporate analog hardware, like tape machines and vintage compressors, to add a unique tone to the tracks.
How Loud Should I Master A Track?
Many producers recommend mastering your track to a certain LUFS, typically -14 dB LUFS for Spotify. This is usually a good guideline, but there are so many different genres and dynamic ranges that can occur in a song that it’s best to use other methods too.
The best way to determine how loud you should master a song is to:
- Use a reference track.
- Leave at least -1dB of headroom.
- Use plugins to check how loud the track is.
- Test your audio at Loudness Penalty.
Reference tracks give us a point of reference for how loud our song is compared to another. Is our song significantly quieter than the reference? Does our track sound like it is under a blanket, lacking presence?
Next, leaving -1 dB of headroom in a track can be beneficial as it helps avoid audio artifacts that may happen when converting tracks from lossless to lossier (ex: .wav to .mp3).
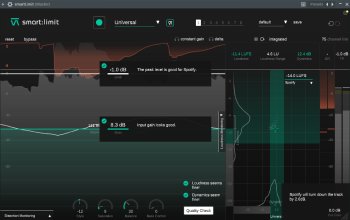
After giving our track some headroom you can use plugins or online tools like Loudness Penalty to check how loud your track is. These plugins or tools will show what LUFS your track is currently sitting at.
What is the Loudness Units Relative to Full Scale (LUFS)?
The Loudness Units relative to Full Scale is a standardized measurement of audio loudness that factors human perception and electrical signal intensity together. LUFS are used to set targets for audio normalization in broadcast systems, like music streaming services.
What Are Streaming Services LUFS Limits?
Difference streaming services use different LUFS normalizations. Below is a guideline for what each streaming service normalizes your audio level to.
| Streaming Service | Recommended LUFS level |
| Spotify | -14 LUFS |
| YouTube | -14 LUFS |
| Apple Music | -16 LUFS |
| Soundcloud | -14 LUFS |
| iTunes | -14 LUFS |
| Apple Podcast | -16 LUFS |
| Amazon Music | -19 LUFS |
| Deezer | -15 LUFS |
| Pandora | -13.5 LUFS |
| Tidal | -14 LUFS |
| AES/EBU | -18 LUFS |
| Netflix | -27 LUFS |
| HBO | -27 LUFS |
What Were The Loudness Wars?
In the past, mastering engineers would attempt to master your music so that it was noticeably louder than the songs and albums you’re trying to compete with. If your song was lower or the same volume as all the rest, there was a chance no one would notice your music because it didn’t stand out in a playlist.
The only way to ensure that your song stands out and isn’t lost in the noise of other songs is by maximizing its volume. However, you didn’t want to go too far because if you did, there’s was a chance that it could end up sounding bad when played next to another track.
This was known as the loudness wars.

Although this started happening before the compact disc (CD), the practice of focusing on loudness in audio mastering started with the CD. With a CD, once the maximum amplitude of a CD was reached, its loudness could be increased further through signal processing techniques.
Thankfully this has, for the most part, stopped. Many online streaming services limit the loudness of each track. Producers that try to maximize their volume, like before, will have their tracks turned down within the streaming service as a result to match their loudness standard.
My Top 5 Plugins For Mastering
There are many plugins out there and many I have not tried. But, my favorite plugins to use in my mastering chain are:
- Sonible Smart:limit
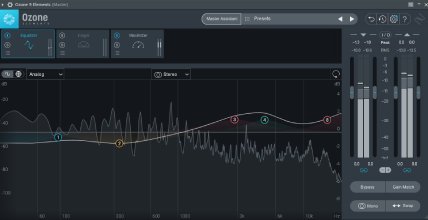
- iZotope Ozone 9
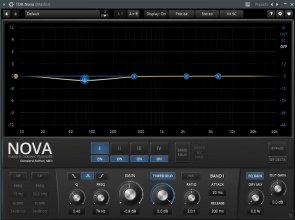
- TDR Nova
- EQ (I use the stock FL Studio one)
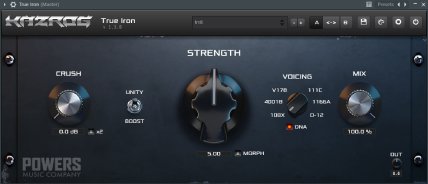
- A plugin that adds some color (ex: Kazrog: True Iron).
And for the plugins, I use for coloring my track I will put it right before the smart:limit. These coloring plugins change depending on the song or I might not use one at all. True Iron adds very subtle harmonic distortion to tracks which sounds great.
Summary
The goal of mastering is to maximize the overall level of your recording while ensuring that it still sounds good. The general guideline is to master your track so that it has at least -1 dB of headroom and sits around -14 LUFS. Remember, this is just a guideline, use your ears!
A quick breakdown for mastering a track:
- Use a reference track to know how loud your track is compared to others in the same genre,
- Leave -1dB of headroom to allow for clean lossless to lossier conversions on streaming platforms.
- Check your tracks LUFS to ensure it isn’t too low or high for the service you are uploading to (-14 LUFS is popular among streaming platforms).
Don’t stress if your track is at -12 LUFS and your track is being uploaded to Spotify which will lower it to -14 LUFS – it’s ok!