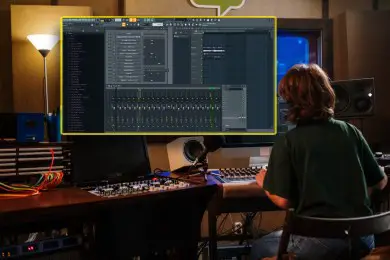
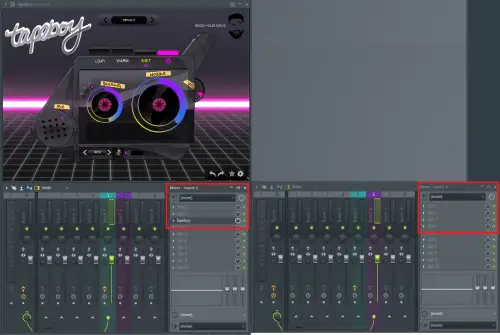
FL Studio has a lot of features available to the user and many of those features will probably never be used or found! There are a few features that are lesser-known but make life in FL Studio so much smoother. In this article, I tell you those 3 features.
- Automate everything
- Preview entire samples
- Copy plugin’s to any mixer channel
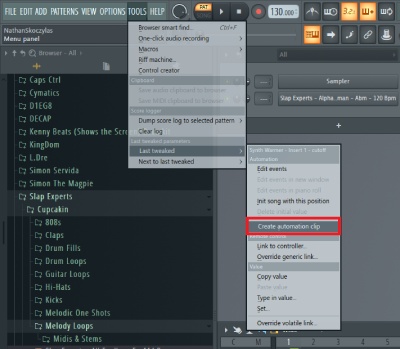
How To Automate Anything In FL20
FL Studio allows you to automate everything by simply clicking the setting you want to automate, then go into the top toolbar under Tools -> Last tweaked -> Create automation clip.
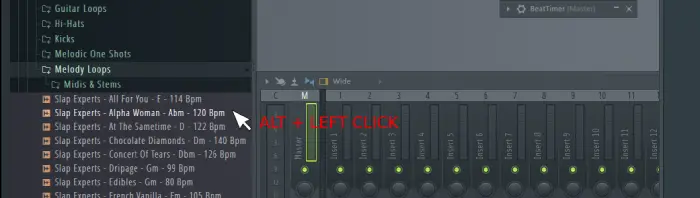
How To Preview An Entire Sample In FL Studio 20
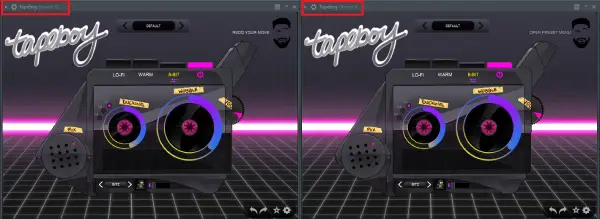
To preview the entire sample or sound in FL Studio hold ALT and LEFT CLICK on the audio file.
Copy Plugin’s From One Channel To Another
FL Studio allows users to copy plugin presets from one channel to another.
- Navigate to the mixer channel that the plugin you want to copy is on.
- Left-click the small arrow next to the plugin to bring up the dropdown menu.
- Left-click and hold “Save Preset As”.
- While Holding left click on “Save Preset As”, drag the plugin to the mixer channel you want it copied on.
- Once “Save Preset As” is hovering over the mixer channel of choice, unclick to drop the plugin on that channel.
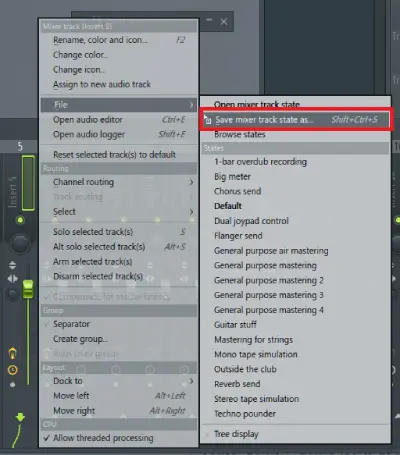
Alternatively, if you want to copy all of the presets you can right-click on the mixer channel’s number. This will bring a drop-down menu up. Go to file and then hold left-click on “Save mixer track state as..”.
While you’re holding that drag your mouse onto the channel you want the plugins to get copied to. Similar to how you did with “Save Preset As”.
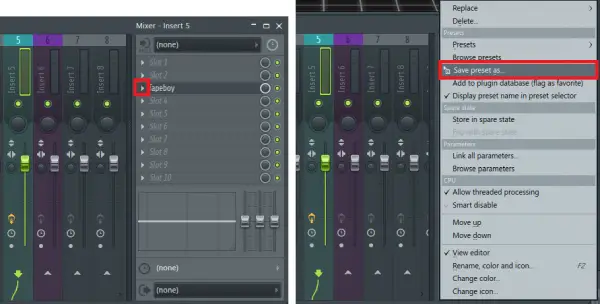
Step 1.
Navigate to the mixer channel that the plugin you want to copy is on. Channel 5 has the plugin we want to copy over to channel 6 in our example.
Step 2.
Left-click the small arrow next to the plugin. This brings up the dropdown menu for the plugin. Left-click and hold “Save Preset As”.
By holding down your left mouse button you can then drag the preset to another channel. Just clicking it will allow you to save the preset which you can then load into the same plugin at any time.
Step 3.
While Holding left click on “Save Preset As”, drag the plugin to the desired mixer channel.
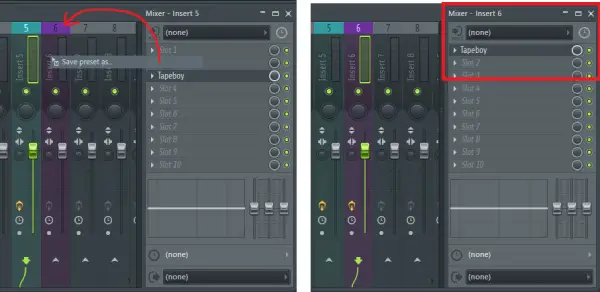
Step 4.
Once “Save Preset As” is hovering over the mixer channel of choice, let go of your left mouse button to drop the plugin on that channel. When you unclick the left mouse button the plugin will appear in the mixer channel.
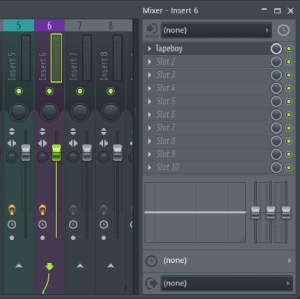
Here we can see the plugin settings from channel 5 match the copied plugin in channel 6. They will now function independently from one another!
Summary
I use these three features every day when I produce music and are features I’ve noticed many, frequent, FL Studio users not use! There are many more features to be discovered in FL Studio too so I’ve included this helpful video for you to find more tips and tricks in FL Studio!