When I first got FL Studio I found it hard to navigate around and know where to set up my audio devices. Eventually, I stumbled upon this method, which I quickly wrote down so I wouldn’t forget!
6 steps to quickly set up your audio device in FL Studio:
- Navigate to audio settings (Options -> Audio Settings)
- Set your audio device to FL Studio ASIO
- Open Fl Studio ASIO Panel (Show ASIO Panel)
- Set your input device (typically the one you’re recording into)
- Set your output device (typically the one your speakers are plugged into)
- Set your buffer length to the highest value your computer can handle to increase audio quality.
This is the simplest method I found to get my audio devices set up in FL Studio. It allows you to quickly switch your input and output devices as you need to.
Verify Your Audio Devices Are Detected
This tutorial assumes that your computer has installed the audio interface drivers successfully – so verify that your computer did install the driver successfully.
Apple OSX
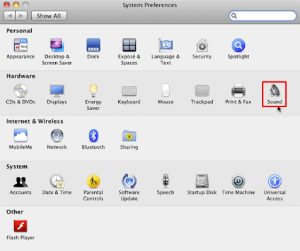
Navigate to the SYstem Prefences -> Sound and ensure your audio devices are showing up.
Windows
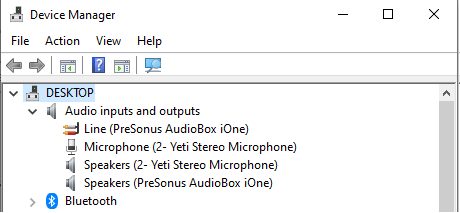
In both the input and output devices, you’ll want to see your audio devices. If you can see them it means they are installed. If they’re not the simplest way to try to get the device installed is to plug it into another USB slot.
There are multiple ways this can be done:
- Control Panel -> Hardware and Sounds (view devices and printers)
- Windows Search “Device Manager”
- Settings -> Devices
- Windows Search -> “Sound Settings”:
Once you have verified your audio devices are recognized by your computer you can then begin setting up your audio devices in FL Studio.
Navigate To Audio Settings In FL Studio
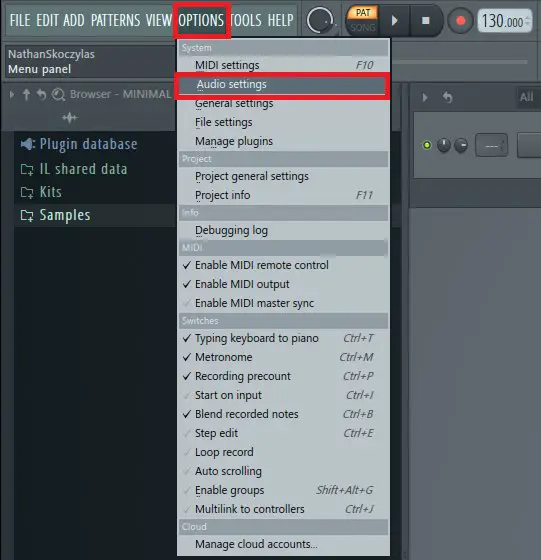
To set up your audio devices in FL Studio use the top toolbar and navigate to:
Options -> Audio Settings
Set The Input/Output Audio Device In FL Studio
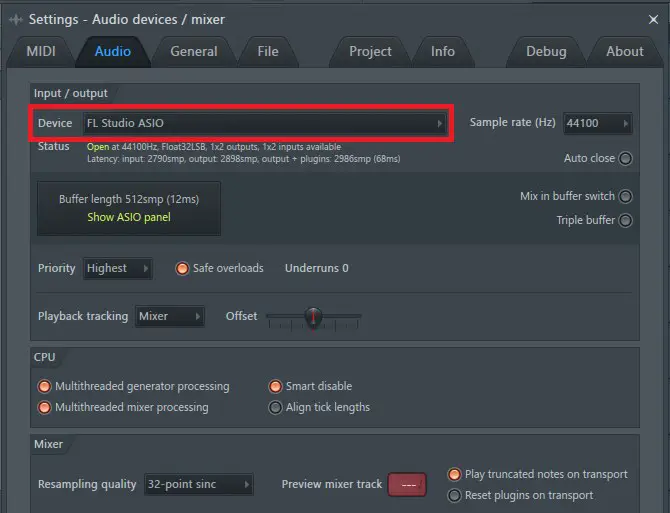
Set the audio device to FL Studio ASIO.
FL Studio ASIO has a higher latency than ASIO4ALL; however, it allows you to listen to audio outside of FL Studio.
Whereas ASIO4ALL has lower latency you’ll not be able to play audio out from anything other than FL Studio. Want to listen to a sample track on YouTube? You won’t be able to.
Setup FL Studio ASIO Options
The ASIO panel is where you’ll select your input and output interface, along with the buffer length.
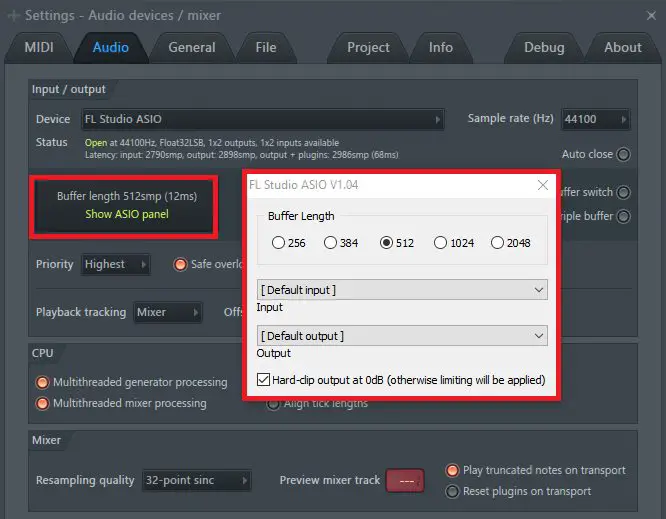
FL Studio ASIO Input
The input device will determine what audio interface will be recorded into FL Studio. Select the audio device you want to use to record with.
If you have multiple audio devices select the one you want to use – this will have to be switched if you are going between multiple devices.
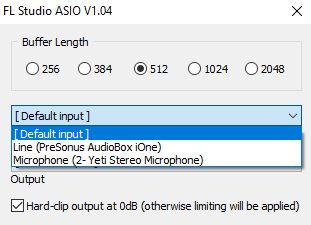
In the picture above I can select either my Blue Yeti USB microphone or my PreSonus AudioBox.
When I have the Blue Yeti selected I will not be able to use the AudioBox to record my guitar (my guitar is plugged into the AudioBox).
When I want to record my guitar I navigate back to the ASIO panel and change the input device to the PreSonus AudioBox. Once the input device is set to the PreSonus AudioBox I can record my guitar.
In many cases if you only have one audio device you can leave it on default; however, it’s always better to specify what device so you know what FL Studio is detecting.
This way if you change your default audio device on your computer (outside of FL Studio) it will not change what device you’re using in FL Studio.
FL Studio ASIO Output
The FL Studio ASIO Output will determine what audio device will output your audio.
To hear your sound in FL Studio select the output device your speakers are plugged into. Some programs, like OBS, will need to match this output device for them to receive the sound internally.
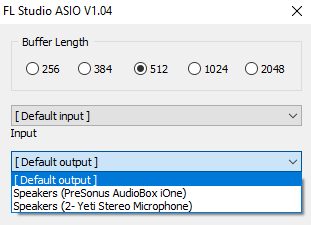
For example, if my speakers are plugged into the Blue Yeti, I will need to select the BlueYeti as my output device to hear the audio in FL Studio.
My Input device does not have to match my output device. I can set my input device to the PreSonus AudioBox to record my guitar while having the output device as my Blue Yeti to listen to what I am doing.
FL Studio ASIO Buffer Length
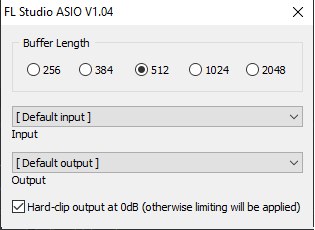
A buffer length that is too low will cause a lot of cracks and pops, while your computer may not be able to handle a higher buffer length casing latency. The buffer length will differ depending on your computer – so select the one that gives you the best sound.
Summary
There are multiple ways you can set up your audio devices in FL Studio; I have found this one to be the quickest and simplest method to remember.
FL Studio ASIO allows you to still listen to audio outside of the DAW while allowing for a latency you can still tolerate for recording.
The FL Studio ASIO panel enables you to set the buffer length to the appropriate value so that you do not hear low-quality audio with crackles and pops.
While the input/output, devices will determine what audio device you are recording with and what device is outputting your sound so you can hear it through your speaks, monitors, or headphones.
